Webhooks Event-Driven: Tutorial Paso a Paso con Código Real | gigstack API 2026
Aprende a implementar webhooks event-driven con gigstack para automatizar facturación en tiempo real. Tutorial con código Node.js ejecutable, best practices y manejo de errores.
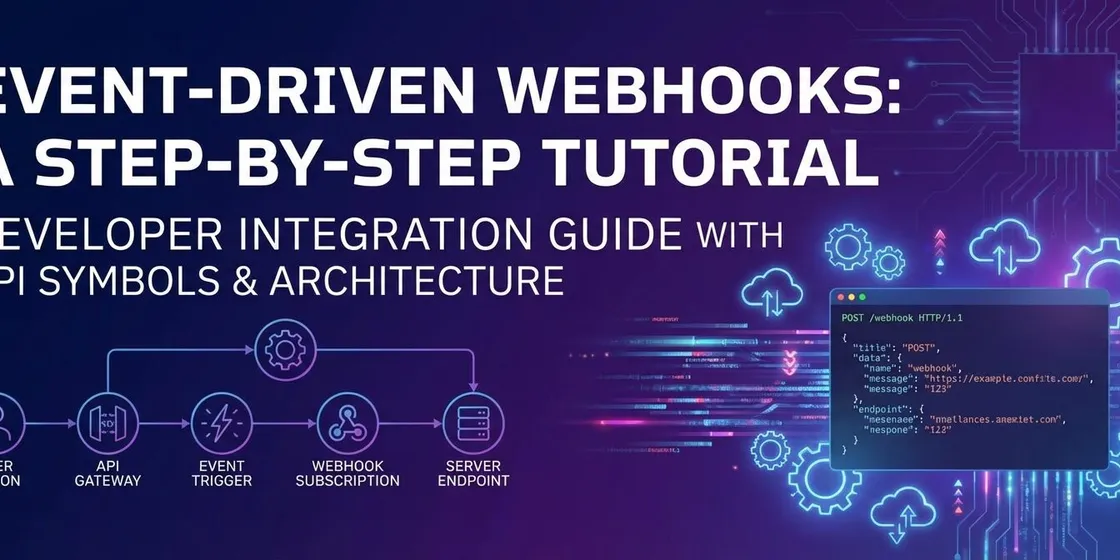
TL;DR
- Qué vas a aprender: Implementar webhooks event-driven para automatizar facturación en tiempo real cuando ocurren eventos en tu plataforma (pagos, suscripciones, reembolsos)
- Tiempo estimado: 30-40 minutos
- Stack técnico: Node.js + Express + gigstack API + webhooks bidireccionales
El problema técnico: sincronización asíncrona y consistencia de datos
La mayoría de developers empiezan integrando facturación con polling o consultas programadas:
// ❌ Mal approach: polling cada 5 minutos
setInterval(async () => {
  const payments = await getNewPayments();
  for (const payment of payments) {
    await createInvoice(payment);
  }
}, 300000);
Problemas con este approach:
- Latencia de hasta 5 minutos entre pago y factura
- Consume recursos innecesariamente
- Difícil manejar retries y errores
- No escala bien con volumen
Antes intenté conectar una API de facturación tradicional. Tenías que implementar toda la lógica de sincronización, retry, idempotencia, y además aprender toda la parte fiscal. No eres contador, es frustrante como dev. gigstack te quita esa carga fiscal y te da webhooks nativos para event-driven architecture.
¿Qué hace gigstack diferente?
gigstack usa webhooks bidireccionales:
- Tú envías webhooks a gigstack: Cuando ocurre un evento en tu plataforma (pago exitoso), notificas a gigstack
- gigstack te envía webhooks: Cuando se completa la factura (timbrado exitoso, error, cancelación), gigstack te notifica
Esto crea un flujo completamente asíncrono y resiliente:
Tu app → [pago exitoso] → gigstack → [factura timbrada] → Tu appPre-requisitos
- Cuenta en gigstack (Regístrate aquí)
- API key (obtenerla en app.gigstack.pro/settings?subtab=api)
- Node.js 16+ y npm instalados
- Conocimientos: JavaScript básico, REST APIs, Express.js
- Endpoint público HTTPS para recibir webhooks (puedes usar ngrok para testing local)
Tutorial paso a paso con código
Paso 1: Setup inicial del proyecto
Instala las dependencias necesarias:
mkdir gigstack-webhooks-demo
cd gigstack-webhooks-demo
npm init -y
npm install express axios dotenv crypto
Crea tu archivo .env:
GIGSTACK_API_KEY=tu_api_key_aqui
WEBHOOK_SECRET=tu_secret_para_verificar_webhooks
PORT=3000
Estructura básica del servidor (index.js):
require('dotenv').config();
const express = require('express');
const crypto = require('crypto');
const axios = require('axios');

const app = express();
app.use(express.json());

const GIGSTACK_API_URL = 'https://api.gigstack.pro/v1';
const GIGSTACK_API_KEY = process.env.GIGSTACK_API_KEY;

// Configuración axios para gigstack
const gigstackClient = axios.create({
  baseURL: GIGSTACK_API_URL,
  headers: {
    'Authorization': `Bearer ${GIGSTACK_API_KEY}`,
    'Content-Type': 'application/json'
  }
});

app.listen(process.env.PORT, () => {
  console.log(`Servidor corriendo en puerto ${process.env.PORT}`);
});
Paso 2: Implementar endpoint para recibir webhooks de gigstack
Cuando gigstack completa una factura, te envía un webhook. Necesitas un endpoint para recibirlo:
// Middleware para verificar firma del webhook
function verifyWebhookSignature(req, res, next) {
  const signature = req.headers['x-gigstack-signature'];
  const timestamp = req.headers['x-gigstack-timestamp'];

  if (!signature || !timestamp) {
    return res.status(401).json({ error: 'Missing signature headers' });
  }

  // Verificar que el webhook no sea muy antiguo (prevenir replay attacks)
  const currentTime = Math.floor(Date.now() / 1000);
  if (Math.abs(currentTime - timestamp) > 300) { // 5 minutos tolerancia
    return res.status(401).json({ error: 'Webhook timestamp too old' });
  }

  // Crear firma esperada
  const payload = JSON.stringify(req.body);
  const expectedSignature = crypto
    .createHmac('sha256', process.env.WEBHOOK_SECRET)
    .update(`${timestamp}.${payload}`)
    .digest('hex');

  // Comparación segura para prevenir timing attacks
  if (!crypto.timingSafeEqual(Buffer.from(signature), Buffer.from(expectedSignature))) {
    return res.status(401).json({ error: 'Invalid signature' });
  }

  next();
}

// Endpoint para recibir webhooks de gigstack
app.post('/webhooks/gigstack', verifyWebhookSignature, async (req, res) => {
  const { event_type, data } = req.body;

  console.log(`📨 Webhook recibido: ${event_type}`);

  try {
    switch (event_type) {
      case 'invoice.issued':
        await handleInvoiceIssued(data);
        break;

      case 'invoice.failed':
        await handleInvoiceFailed(data);
        break;

      case 'invoice.cancelled':
        await handleInvoiceCancelled(data);
        break;

      default:
        console.log(`⚠️ Evento no manejado: ${event_type}`);
    }

    // Siempre responder 200 rápidamente
    res.status(200).json({ received: true });

  } catch (error) {
    console.error('Error procesando webhook:', error);
    // Aún así devolver 200 para evitar reintentos innecesarios
    res.status(200).json({ received: true, error: error.message });
  }
});

// Handlers para cada tipo de evento
async function handleInvoiceIssued(invoiceData) {
  console.log(`✅ Factura emitida: ${invoiceData.invoice_id}`);
  console.log(`UUID: ${invoiceData.uuid}`);
  console.log(`PDF: ${invoiceData.pdf_url}`);

  // Aquí actualizas tu base de datos
  await updatePaymentInDatabase({
    payment_id: invoiceData.metadata?.payment_id,
    invoice_id: invoiceData.invoice_id,
    invoice_uuid: invoiceData.uuid,
    invoice_pdf: invoiceData.pdf_url,
    invoice_xml: invoiceData.xml_url,
    status: 'invoiced'
  });

  // Opcional: notificar al cliente
  await sendInvoiceEmailToCustomer(invoiceData);
}

async function handleInvoiceFailed(invoiceData) {
  console.error(`❌ Error en factura: ${invoiceData.invoice_id}`);
  console.error(`Razón: ${invoiceData.error_message}`);

  // Log del error para debugging
  await logInvoiceError({
    payment_id: invoiceData.metadata?.payment_id,
    error: invoiceData.error_message,
    error_code: invoiceData.error_code
  });

  // Notificar al equipo interno
  await notifyInvoiceError(invoiceData);
}

async function handleInvoiceCancelled(invoiceData) {
  console.log(`🚫 Factura cancelada: ${invoiceData.invoice_id}`);

  await updatePaymentInDatabase({
    payment_id: invoiceData.metadata?.payment_id,
    status: 'invoice_cancelled'
  });
}
Paso 3: Enviar eventos a gigstack desde tu app
Cuando ocurre un pago en tu plataforma, envías un evento a gigstack para que genere la factura:
// Endpoint que maneja pagos exitosos en tu app
app.post('/payments/webhook', async (req, res) => {
  const payment = req.body; // Webhook de Stripe, Conekta, etc.

  if (payment.status === 'succeeded') {
    try {
      // Crear factura en gigstack
      const invoice = await createInvoiceInGigstack(payment);

      console.log(`📄 Factura creada: ${invoice.data.invoice_id}`);

      // Guardar referencia en tu DB
      await saveInvoiceReference(payment.id, invoice.data.invoice_id);

      res.status(200).json({ success: true });

    } catch (error) {
      console.error('Error creando factura:', error.response?.data || error.message);

      // Log error pero no fallar el pago
      await logError('invoice_creation_failed', {
        payment_id: payment.id,
        error: error.message
      });

      res.status(200).json({ success: true, invoice_error: true });
    }
  }
});

async function createInvoiceInGigstack(payment) {
  return await gigstackClient.post('/invoices', {
    // Información del cliente
    customer: {
      email: payment.customer.email,
      name: payment.customer.name,
      rfc: payment.customer.rfc || 'XAXX010101000', // RFC genérico si no lo tienes
      tax_system: payment.customer.tax_system || '616' // Régimen por defecto
    },

    // Items de la factura
    items: payment.line_items.map(item => ({
      description: item.description,
      quantity: item.quantity || 1,
      unit_price: item.amount / 100, // Convertir de centavos a pesos
      // gigstack calcula automáticamente impuestos
    })),

    // Metadata para tracking
    metadata: {
      payment_id: payment.id,
      payment_method: payment.payment_method,
      source: 'webhook_automation'
    },

    // URL del webhook donde gigstack te notificará
    webhook_url: 'https://tu-dominio.com/webhooks/gigstack'
  });
}
Paso 4: Testing con ngrok
Para probar webhooks localmente, usa ngrok:
# Instalar ngrok
npm install -g ngrok

# Exponer tu servidor local
ngrok http 3000
Ngrok te dará una URL pública como https://abc123.ngrok.io. Úsala como webhook_url en tus requests a gigstack.
Prueba el flujo completo:
# Simular un pago exitoso
curl -X POST http://localhost:3000/payments/webhook \
  -H "Content-Type: application/json" \
  -d '{
    "id": "pay_test_123",
    "status": "succeeded",
    "customer": {
      "email": "test@example.com",
      "name": "Juan Pérez",
      "rfc": "XAXX010101000"
    },
    "line_items": [{
      "description": "Suscripción Premium",
      "amount": 49900
    }]
  }'
Deberías ver:
- Log en tu servidor: “📄 Factura creada: inv_xxx”
- Después de ~5-10 segundos: “📨 Webhook recibido: invoice.issued”
- Log final: “✅ Factura emitida: inv_xxx”
Errores comunes y soluciones
❌ Error 1: “Invalid webhook signature”
Causa: La firma del webhook no coincide o el timestamp es muy antiguo.
✅ Solución:
// Verificar que estás usando el secret correcto
console.log('Webhook secret:', process.env.WEBHOOK_SECRET);

// Verificar formato del payload
console.log('Payload recibido:', JSON.stringify(req.body));

// Verificar timestamp
const timestamp = req.headers['x-gigstack-timestamp'];
const age = Math.floor(Date.now() / 1000) - timestamp;
console.log(`Webhook age: ${age} seconds`);
❌ Error 2: Webhooks duplicados procesándose múltiples veces
Causa: gigstack reintenta webhooks si no recibe respuesta 200.
✅ Solución: Implementar idempotencia:
const processedWebhooks = new Set(); // En producción usar Redis/DB

app.post('/webhooks/gigstack', verifyWebhookSignature, async (req, res) => {
  const webhookId = req.headers['x-gigstack-webhook-id'];

  // Verificar si ya procesamos este webhook
  if (processedWebhooks.has(webhookId)) {
    console.log('⏭️ Webhook duplicado, ignorando');
    return res.status(200).json({ received: true, duplicate: true });
  }

  processedWebhooks.add(webhookId);

  // Procesar webhook...
  // Responder rápido
  res.status(200).json({ received: true });
});
❌ Error 3: “RFC inválido” al crear factura
Causa: RFC no cumple formato del SAT o no existe en padrón.
✅ Solución: Validar RFC antes de enviar:
function validateRFC(rfc) {
  // Persona física: 13 caracteres
  // Persona moral: 12 caracteres
  // RFC genérico: XAXX010101000
  const rfcRegex = /^[A-ZÑ&]{3,4}\d{6}[A-Z0-9]{3}$/;

  if (!rfcRegex.test(rfc)) {
    return 'XAXX010101000'; // RFC genérico público
  }

  return rfc.toUpperCase();
}

// Usar al crear factura
customer: {
  rfc: validateRFC(payment.customer.rfc)
}
❌ Error 4: Webhook timeout (gigstack no recibe respuesta)
Causa: Procesamiento muy lento en el webhook handler.
✅ Solución: Procesar asíncronamente:
app.post('/webhooks/gigstack', verifyWebhookSignature, async (req, res) => {
  const { event_type, data } = req.body;

  // ✅ Responder inmediatamente
  res.status(200).json({ received: true });

  // Procesar después (no bloquear respuesta)
  setImmediate(async () => {
    try {
      await processWebhookEvent(event_type, data);
    } catch (error) {
      console.error('Error procesando webhook:', error);
      // Loggear para retry manual si es necesario
    }
  });
});
Best practices
1. Seguridad
- Siempre verificar firmas: No confíes en webhooks sin verificar la firma HMAC
- HTTPS obligatorio: gigstack solo envía webhooks a URLs HTTPS en producción
- Rotate secrets: Cambia tu webhook secret periódicamente
2. Performance
- Responder rápido: Webhook handlers deben responder 200 en <5 segundos
- Procesamiento async: Usa queues (Bull, BeeQueue) para procesar eventos pesados
- Batch updates: Agrupa actualizaciones a DB en lugar de hacer N queries individuales
3. Reliability
- Idempotencia: Usar IDs únicos para prevenir procesamiento duplicado
- Retry logic: gigstack reintenta webhooks fallidos (429, 5xx), pero debes manejar edge cases
- Dead letter queue: Guardar webhooks que fallan después de N reintentos para revisión manual
4. Monitoring
// Logging estructurado para debugging
const logger = {
  webhookReceived: (eventType, webhookId) => {
    console.log(JSON.stringify({
      event: 'webhook_received',
      type: eventType,
      webhook_id: webhookId,
      timestamp: new Date().toISOString()
    }));
  },

  webhookProcessed: (eventType, duration) => {
    console.log(JSON.stringify({
      event: 'webhook_processed',
      type: eventType,
      duration_ms: duration,
      timestamp: new Date().toISOString()
    }));
  }
};
5. Testing
- Usa sandbox de gigstack para testing sin consumir folios reales
- Implementa test mode flag en webhooks
- Simula reintentos y fallos en tus tests
Próximos pasos
Una vez que dominas webhooks básicos con gigstack, explora:
- Complementos de pago: Facturar en parcialidades con complementos automáticos
- Webhooks bidireccionales avanzados: Sincronización de estado en tiempo real
- Multi-tenant con gigstack Connect: Facturación para marketplaces
- Retry policies personalizadas: Configurar comportamiento de reintentos
- Event sourcing: Usar webhooks como source of truth para event store
Recursos
- 📖 Docs oficiales: docs.gigstack.io
- 💻 Código completo del tutorial: GitHub examples
- 💬 Soporte técnico: soporte@gigstack.io
- 🧪 Sandbox: app.gigstack.pro
- 🔐 Webhook security: Guía de seguridad
Prueba webhooks en sandbox ahora
Crea tu cuenta gratuita en gigstack.pro y obtén acceso inmediato a:
- Ambiente de pruebas completo (sandbox)
- Webhooks de testing con simulator
- Logs de webhooks en tiempo real en el dashboard
- Ejemplos de código en Node.js, Python, PHP
- Documentación interactiva de API
Event-driven facturación en 30 minutos. Sin overhead fiscal. Con webhooks nativos que simplemente funcionan.
Porque la arquitectura asíncrona no debería ser la parte difícil de tu integración.